Easy Way to Load Samples in Korg Volca Sample
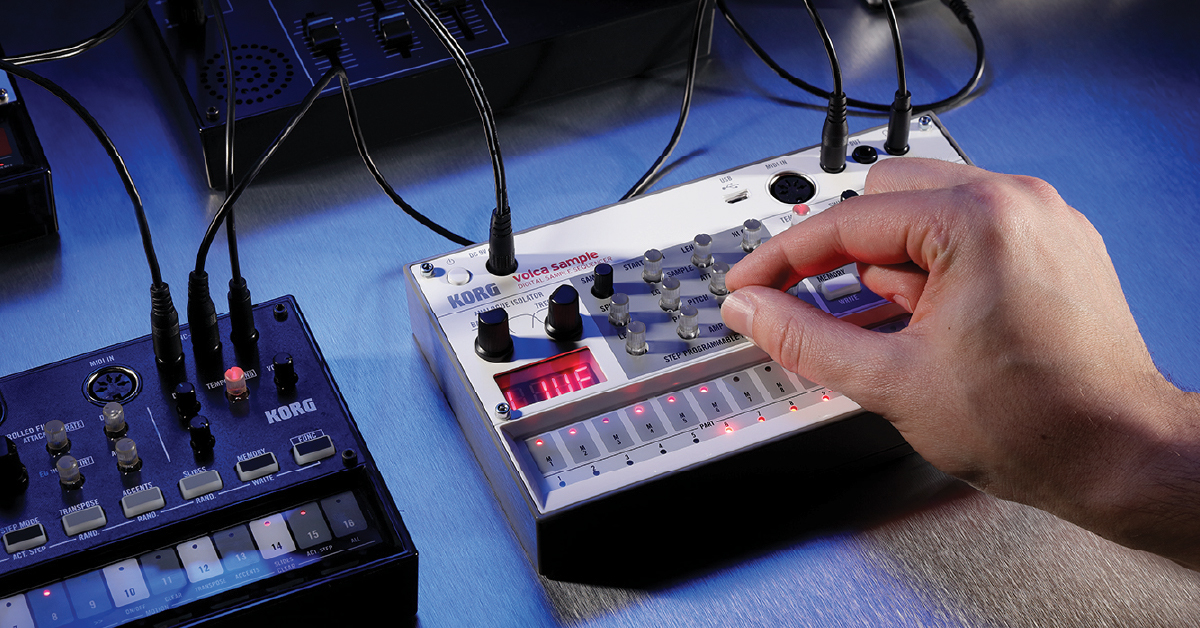
The Korg Volca Sample 2 is a small but very powerful sequencer to have in your studio and live rigs. In this guide, we will show you how to register, set up, and work with a Korg Volca Sample 2 for the first time. Follow the sections below to get started.
- Register the Volca Sample 2
- Register the software bundle
- Import custom samples
- Mobile device
- Computer
- How to create a pattern on the Volca Sample 2
- Automating samples
- Editing patterns
A few notes on powering the Volca Sample 2 before we begin:
- If you want to use a power supply with the Volca Sample 2, then you must use the Korg Volca power supply. Using a generic power supply may damage the unit.
- The Volca Sample 2 has two different battery modes: nickel-hybrid and alkaline. So, depending on the batteries you use, you may need to change the mode. This is because the alkaline and nickel-hybrid batteries discharge at different rates, and the unit needs to know so it can compensate correctly.
- To change battery modes, press and hold the FUNC button while powering on the unit, then press M2 to switch between nickel-hybrid (bt.nH) and alkaline (bt.AL).
- The Volca Sample 2 cannot be powered via USB.
Before we dive into using the Volca Sample 2, the first thing to do is to register it with Korg. If you register the device within the first 90 days of purchase, Korg will extend your warranty for an extra year, and you will also receive free bundled software.
- Go to the Korg product registration page and create or log in to your Korg account.
- On your account page, click Register a Product, fill out the required information, then click Save.
- Keep your Sweetwater invoice handy, as you'll need to enter the purchase date.
When you purchase a Korg synth product, you'll receive licenses for virtual instruments, effects plug-ins, Reason Studios' Reason Lite DAW, and free keyboard lessons. All you need to do is go to the Korg License Center page, enter the bundle code number on the card included in the box, and click Submit. Once complete, you'll receive licenses and activation instructions for each piece of software.
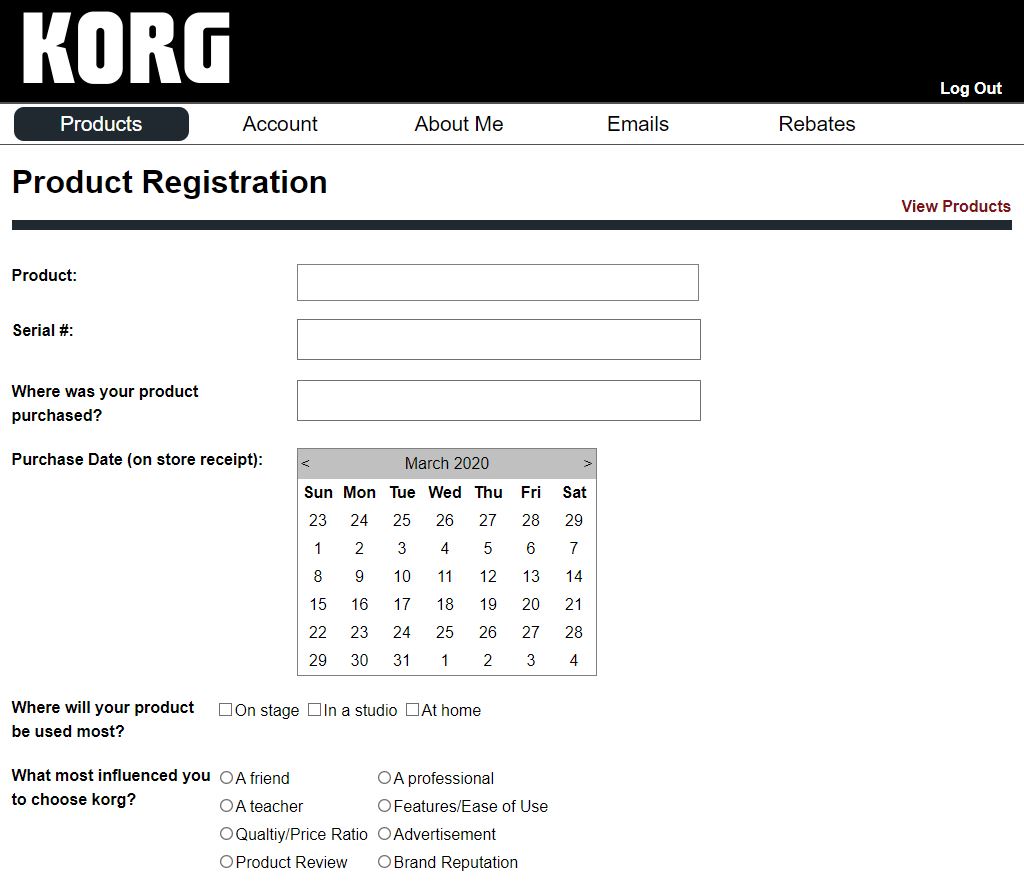
Click the image to register your Volca Sample 2
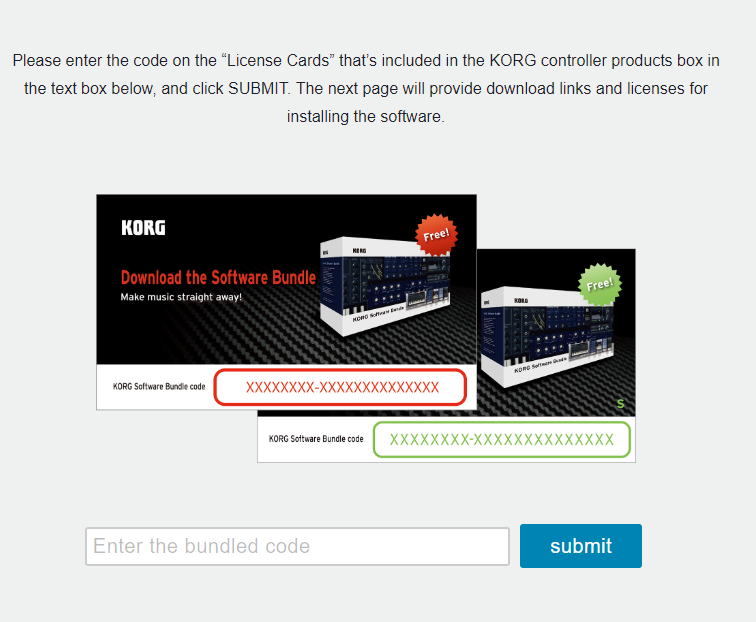
Click the image to register your software bundle
While the Volca Sample 2 already comes with some excellent factory content, one great thing is the ability to import custom samples. Korg has even released free bonus content for you to try out, too! You can import samples via your mobile device or on your computer.
One way to import samples is through your mobile device. If you're an iOS user, then you can transfer samples via Korg's AudioPocket app. Android users will need to use the third-party Caustic Editor app. But no matter the platform, the process will be the same. You just need to connect an 1/8-inch audio cable from your device's headphone jack to the Volca Sample's SYNC IN.
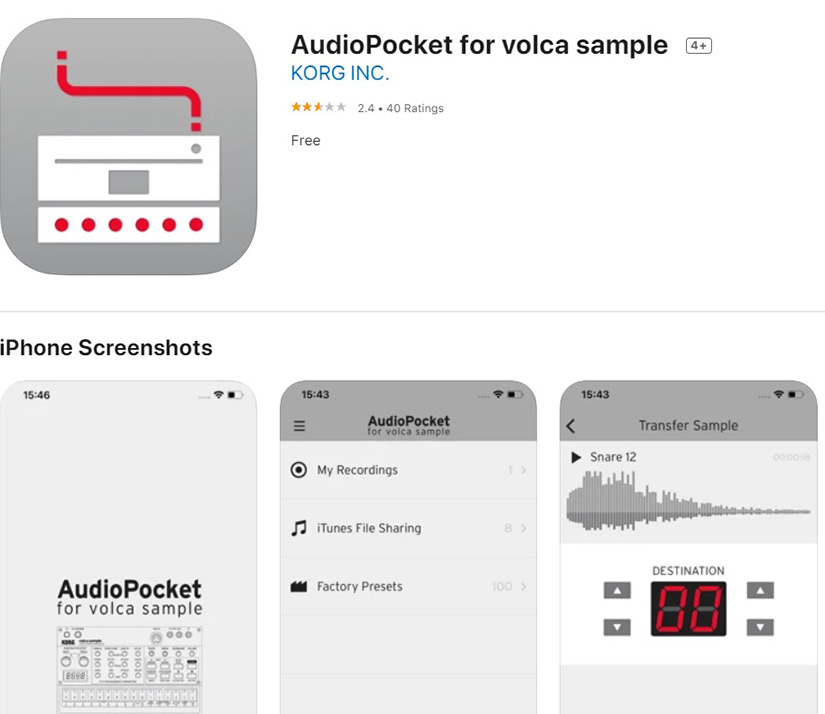
Click the image to download AudioPocket for iOS
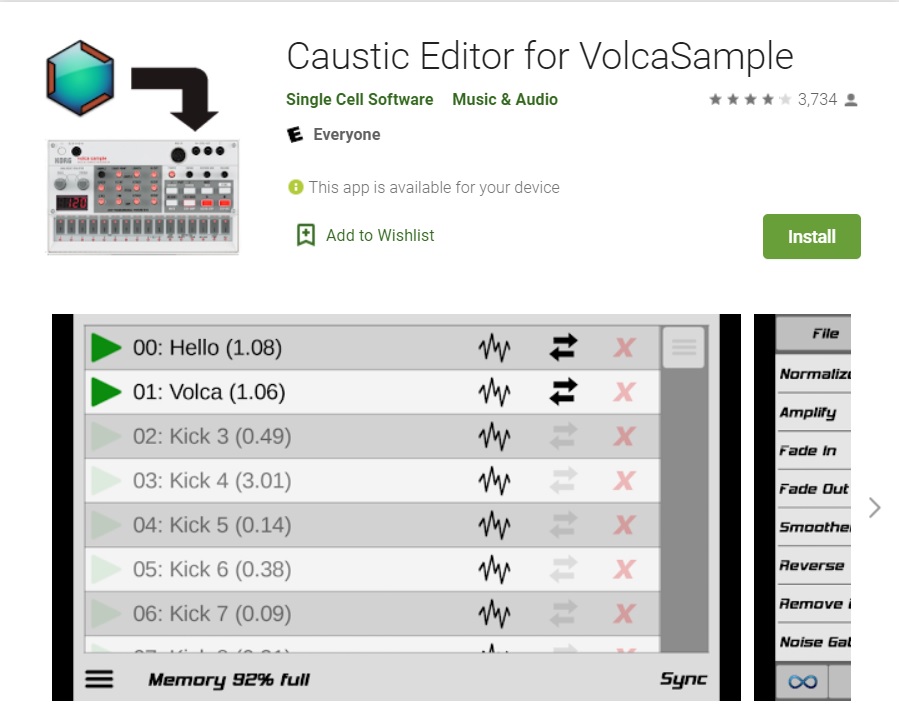
Click the image to download Caustic Editor for Android
Introducing Korg iOS app: AudioPocket for Volca Sample
PC USERS: You must install the latest Korg USB-MIDI driver before connecting the Volca Sample 2 to your computer.
The other way to transfer audio samples is by connecting the unit to your computer via USB. The easiest way to transfer is by using the Volca Sample Librarian, as it's a drag-and-drop process. However, Korg also supports third-party librarian software such as the popular vosyr sample manager, Caustic Editor, and Volca-X. These applications have built-in sample and pattern management and audio editing capabilities.

Click the image to download the Korg Volca Sample Librarian
Click the image to download the third-party applications for the Korg Volca Sample 2
There are 16 pattern locations you can save into memory. When you take your Volca Sample 2 out of the box, pattern banks 13–16 are empty, but you can overwrite the factory patterns if you wish. All you need to do is select a memory slot, select the sample you want, then either live or step record. Let's create a pattern from scratch.
- Press and hold the MEMORY button and press M13, which is the first empty pattern slot.
- Use the flashing tempo knob to change the tempo.
- Press M1–M10 to select a sample and use the black Sample knob to change it.
- Press the REC button to record arm the track, then press PLAY to begin recording.
- Hold the FUNC button while pressing the REC button to enter STEP REC mode. This will allow you to record a sample one step at a time. Step recording is useful when you need to be exact on straight-eighth or sixteenth-note patterns.
- Press the REC button to disarm the track.
- Once you're happy with your pattern, hold the FUNC button, press the MEMORY button, and select the memory slot where you want to save your pattern.
One cool feature of the Volca Sample 2 is automating sample parameters using the Motion Sequence feature. While you can fine-tune the sound of your sample (e.g., pitch, attack, decay, etc.) globally, there may be a time when you just want the pitch of the snare drum to drop for one specific hit to give it a little extra color. Follow these steps to learn how to automate sample parameters.
- Select the sample you want to automate, press and hold the FUNC button, then press the M12 (MOTION SEQ ON/OFF) pad.
- Record arm the track, press PLAY,and move the parameter knobs you wish to change.
- Once the pattern has played through once, the function is automatically deactivated.
- Hold the FUNC button and press M13 (MOTION SQ CLEAR) to erase the automation.
There may be a time when you aren't entirely happy with how the pattern turned out. It's easy to edit everything without having to start from scratch. You can edit individual steps, clear entire parts, or clear a whole pattern.
- Edit individual steps: While in LIVE mode, select the sample you want to edit, then press the STEP MODE button. Once you're in step mode, press a step key to toggle the step on or off.
- Clear entire parts: While in LIVE mode, select the sample you want to clear, press and hold the FUNC button, then press the M15 (CLEAR PART) key.
- Clear whole patterns: While in LIVE mode, press and hold the FUNC button, then press the M16 (CLEAR ALL) pad.
You can chain multiple patterns together to make one extended sequence. All you need to do is press and hold the MEMORY button, along with the first and last pattern banks, to select the range. For example, if you want to chain patterns 1–4 together, press and hold the MEMORY button, then press and hold M1 and M4. Please note that chaining patterns together is for playback only, and you can't record or use the FUNC + step number and REVERSE buttons.
Korg Livestream — Creating Lo-fi Hip-hop Beats with the Korg Volca Sample
SoundBuilder Series – volca sample
Related Articles
When you need help, Sweetwater has the answers!
Our knowledge base contains over 28,000 expertly written tech articles that will give you answers and help you get the most out of your gear. Our pro musicians and gear experts update content daily to keep you informed and on your way. Best of all, it's totally FREE, and it's just another reason that you get more at Sweetwater.com.

Source: https://www.sweetwater.com/sweetcare/articles/korg-volca-2-quickstart-guide/
0 Response to "Easy Way to Load Samples in Korg Volca Sample"
Post a Comment